Ever looked at your pantry and thought, “Why is everything I need always hiding behind a mountain of canned beans?” Yeah, me too. That’s exactly why I decided to build a DIY pegboard shelf—and let me tell you, it was a total game-changer. Not only did it whip my chaotic pantry into shape, but it also made me feel mildly like a Pinterest queen. Mildly.
So if you’re ready to reclaim your pantry from the clutches of clutter, grab your drill and a cup of coffee—we’re building a pegboard shelf that’s both functional and kind of fun to show off (if you’re into that sort of thing, and let’s be honest—you are 😏).
Why a Pegboard Shelf?
Let’s start with the obvious: why pegboard?
It’s crazy versatile
You can hang baskets, shelves, hooks—basically anything short of your pet cat (though I wouldn’t test that). Pegboards give you full control over your storage layout, and the best part? You can change it up whenever you feel like it. Seasonal snack rotation, anyone?
It saves serious space
If your pantry is tighter than your jeans after Thanksgiving, a pegboard shelf gives you vertical storage that actually makes sense.
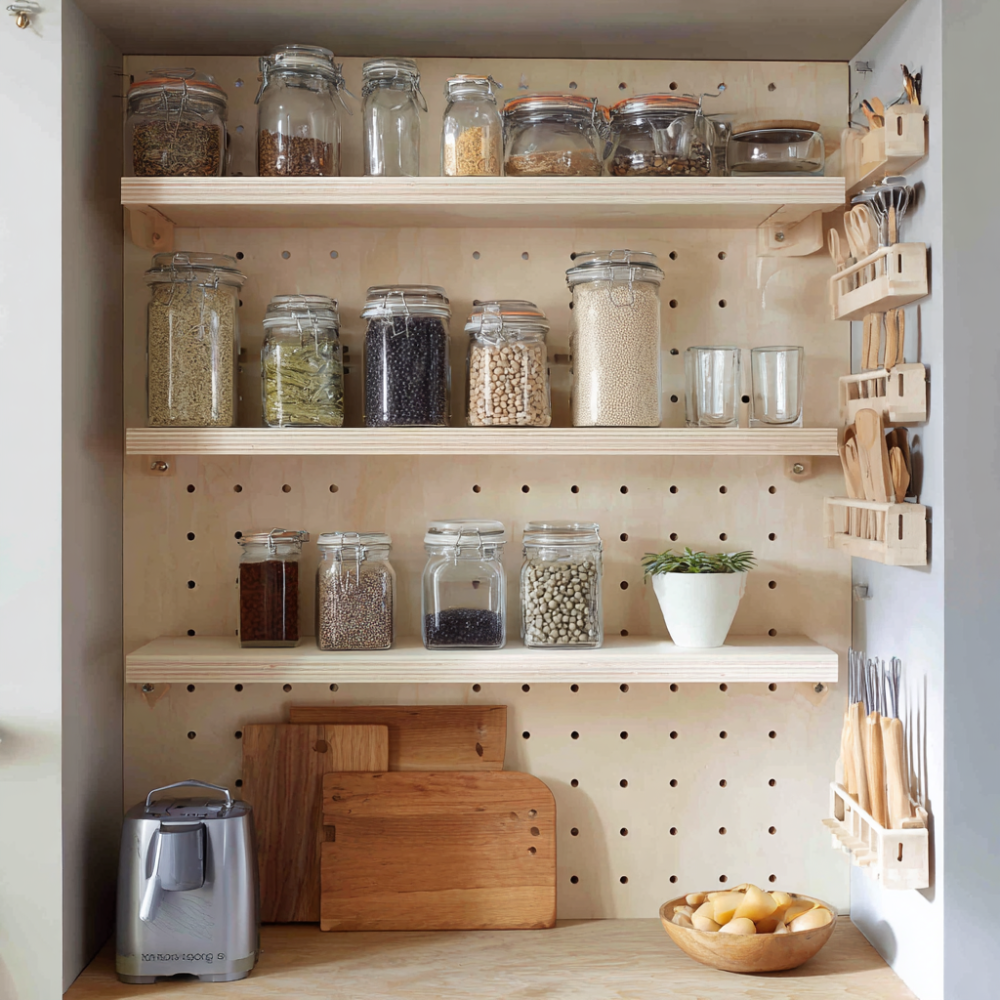
It looks good
Yep, I said it. Pegboards can look pretty dang cute when styled right—no more sad plastic bins and mystery Tupperware towers.
What You’ll Need
Before we roll up our sleeves, let’s talk tools and supplies. Here’s everything I used (and yes, I actually used them—no fluff):
Tools:
- Drill (cordless = life)
- Screwdriver
- Level (unless you’re into slanted shelves 🤷♀️)
- Stud finder (optional, but highly recommended)
- Measuring tape
- Pencil
Materials:
- Pegboard panel (cut to fit your pantry wall)
- 1”x2” wood strips (for the backing frame)
- Wood screws
- Wall anchors (if not hitting studs)
- Hooks and pegboard accessories (baskets, shelves, clips)
- Paint or stain (optional, but it levels up the look)
Step 1: Measure Your Space (Yes, You Actually Have to)
Okay, I know, measuring isn’t the fun part. But trust me, eyeballing it never ends well. Been there, patched that hole.
- Measure the height and width of the wall you’re working with.
- Leave a little breathing room around outlets, baseboards, or anything else weirdly sticking out of your wall.
- FYI: Pegboards come in standard sizes like 2×4 feet. You can cut them down or piece multiple panels together if needed.
Pro Tip: Sketch a super rough layout on paper—it’ll save you a ton of frustration later. Even if it looks like a toddler drew it, it helps. Promise.
Step 2: Build the Backing Frame
Here’s where things get real.
Pegboards need space behind them so you can actually stick pegs in (wild, I know). That’s where the 1”x2” wood strips come in—they create a simple frame that lifts the board off the wall.
To build the frame:
- Cut the wood strips to fit the outer edges of your pegboard.
- Use screws to attach them to the back side of the pegboard. You’re basically making a shallow box.
- Optional but helpful: Add a horizontal center strip for extra support if your pegboard is wide.
Make sure everything’s snug and secure. No one wants a shelf collapsing on their quinoa stash.
Step 3: Find the Studs (No, Not Like That 😏)
Use your stud finder (the tool, not your dating app) to locate the studs in your wall. Mark them with a pencil.
Why? Because mounting your pegboard into studs = solid as a rock. If you can’t hit studs, don’t panic—just use heavy-duty wall anchors.
Step 4: Mount the Pegboard
This part feels official—and it’s when your project really starts looking like something.
- Hold the pegboard (with the frame attached) up to the wall.
- Use a level to make sure it’s, well, level. Unless you like gravity-defying snacks.
- Drill screws through the frame directly into the studs (or anchors).
- Use 4–6 screws total, one near each corner and a few in the middle for good measure.
Boom. Mounted. Take a step back and admire that fine work.
Step 5: Accessorize Like a Boss
Now for the fun part—dressing up your pegboard.
What can you hang?
- Wire baskets: Perfect for chips, oatmeal packets, and those rogue snack bars.
- Mini shelves: Great for spices, jars, or anything that isn’t a pain to balance.
- Hooks: Hang scissors, measuring cups, or even a little notepad to jot down shopping lists.
- Plastic bins: Label them if you’re feeling fancy.
Move stuff around, test it out, change your mind 10 times, and eventually settle on something that feels chef’s kiss.
BTW: I found a pack of pegboard accessories online for under $20—totally worth it.
Bonus Points: Customize It
Feeling crafty? You can paint your pegboard to match your pantry or go for a bold color that pops.
I went with matte black, because apparently I think I live in a design magazine now. But hey—it looks slick and hides dust. Win-win.
You can also:
- Add labels to bins for that Pinterest aesthetic.
- Stick on a small chalkboard for meal planning.
- Use cute hooks or metal letters for a fun touch.
Let your inner Martha Stewart run wild (just… keep it under budget, yeah?).
Common Pegboard Mistakes (And How Not to Be That Person)
Learn from my trials, errors, and one particularly dramatic pegboard collapse:
- Don’t skip the frame. Seriously. Without that backing frame, your pegs won’t stick.
- Avoid cheap pegboards. The super-thin ones warp and crack faster than you can say “storage upgrade.”
- Measure your accessories. Some peg hooks don’t fit all boards—double-check the hole spacing.
- Don’t overload it. It’s a pegboard, not a bookshelf. Your canned soup collection belongs elsewhere, my friend.
Final Touches: Organize, Reorganize, Then Brag
Now that everything’s up and in place, take a sec to tweak your layout. Trust me, you’ll find a better flow after using it for a few days.
Need some ideas?
- Top row: Rarely used stuff (hello, holiday sprinkles).
- Middle rows: Everyday essentials—spices, snacks, measuring tools.
- Bottom bins: Heavier items or kid-friendly snacks within reach.
Then, and this is important: show it off.
Snap a pic, text it to your mom, maybe even drop it on Instagram with an “#adulting” caption. You earned it.
Wrapping It Up: Your Pantry’s Glow-Up Is Complete
So there you have it—your step-by-step DIY pegboard shelf that’ll make your pantry not only functional but actually kinda fun to use. Whether you’re storing snacks, spices, or those random things you never knew where to put before, this little wall of wonder pulls serious weight.
It’s simple, affordable, and lets you customize the heck out of your space. And honestly? Every time I grab a neatly organized granola bar off my pegboard, I feel like I’ve got my life together. (Even if the rest of the kitchen is, um, “lived in.”)
Give it a try. You’ll wonder why you waited this long.