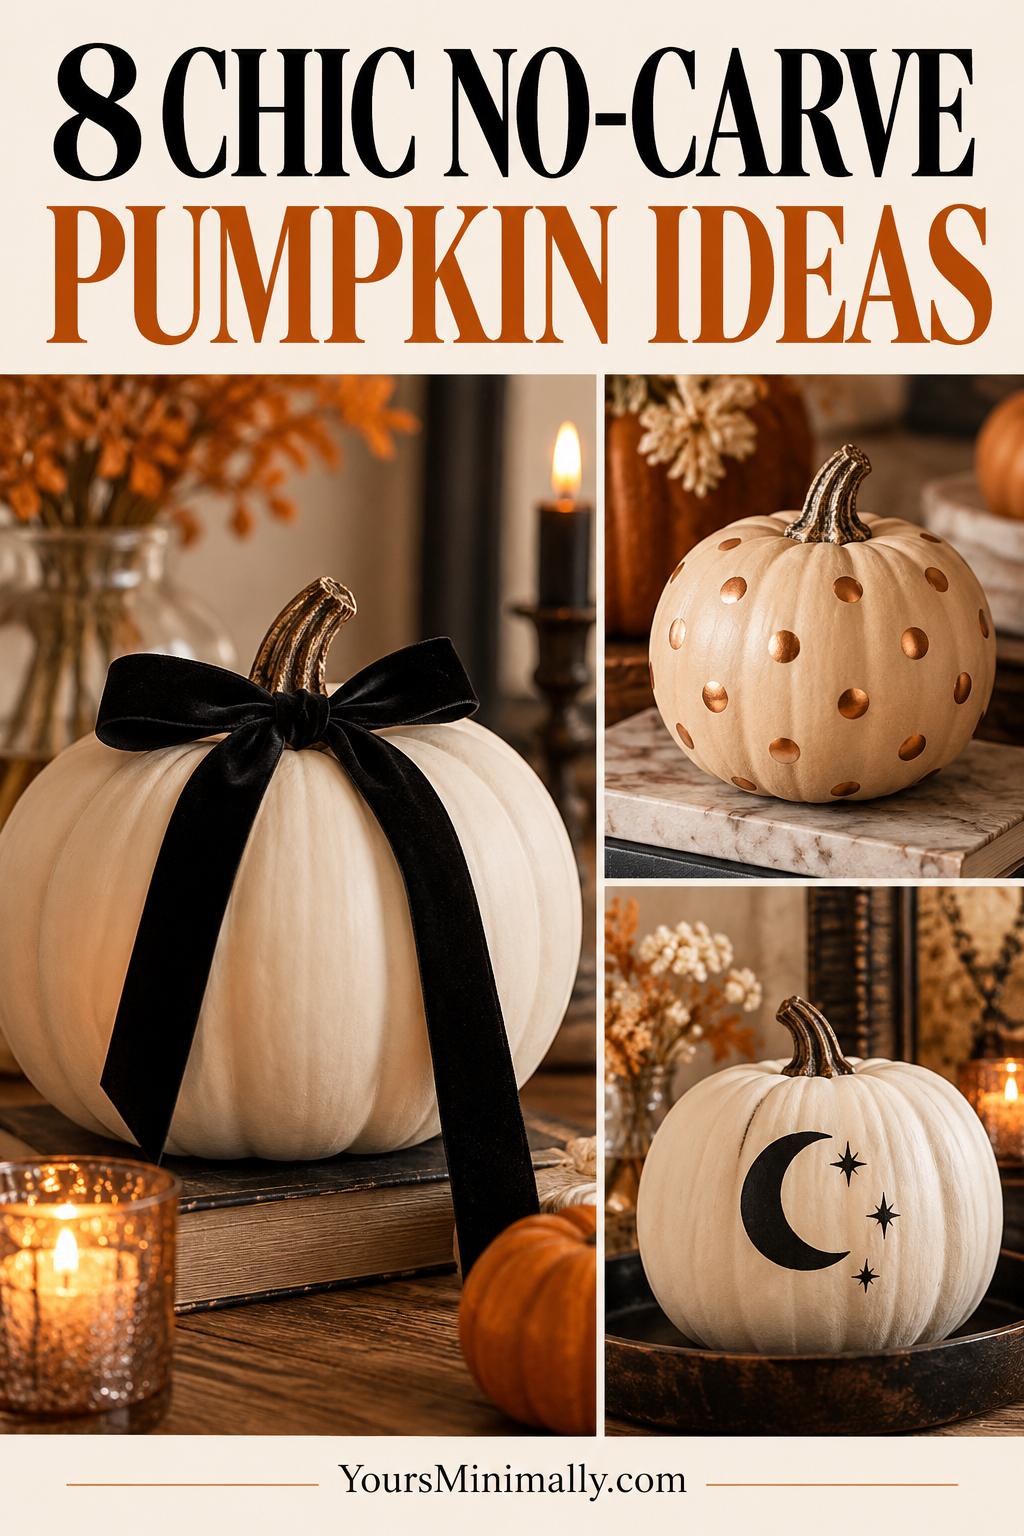
No-carve pumpkins let you change the look of a room without a carving kit or an elaborate display. A quiet color, a small painted motif, or a piece of ribbon can be enough to make a plain craft pumpkin look considered. These eight ideas focus on simple finishes that sit comfortably beside neutral furniture and ordinary autumn decor. The examples use faux or craft pumpkins so the projects can be stored and reused. Choose one design to repeat, or make a small group in related colors. You do not need to combine every technique on a single pumpkin.
Pick the pumpkin and finish before buying supplies
Choose a stable craft pumpkin with a surface suited to the paint or adhesive you intend to use. Read both sets of instructions before starting, since foam, plastic, and other finishes can behave differently. A small test on an inconspicuous area is more useful than guessing. Protect the work surface, keep the workspace appropriate for the products, and allow the recommended drying and curing time between stages.
These projects are decorative objects, not food. Keep them separate from pumpkins intended for eating. If you adapt an idea to a real pumpkin, use products suitable for the surface, avoid puncturing it, and check the pumpkin regularly for deterioration. The designs below are mainly intended for indoor or appropriately sheltered display, not an assumption that every craft product will withstand weather. Start with one pumpkin and a few supplies you will use again instead of buying a large collection for one afternoon.
1. Cream paint and a black velvet ribbon
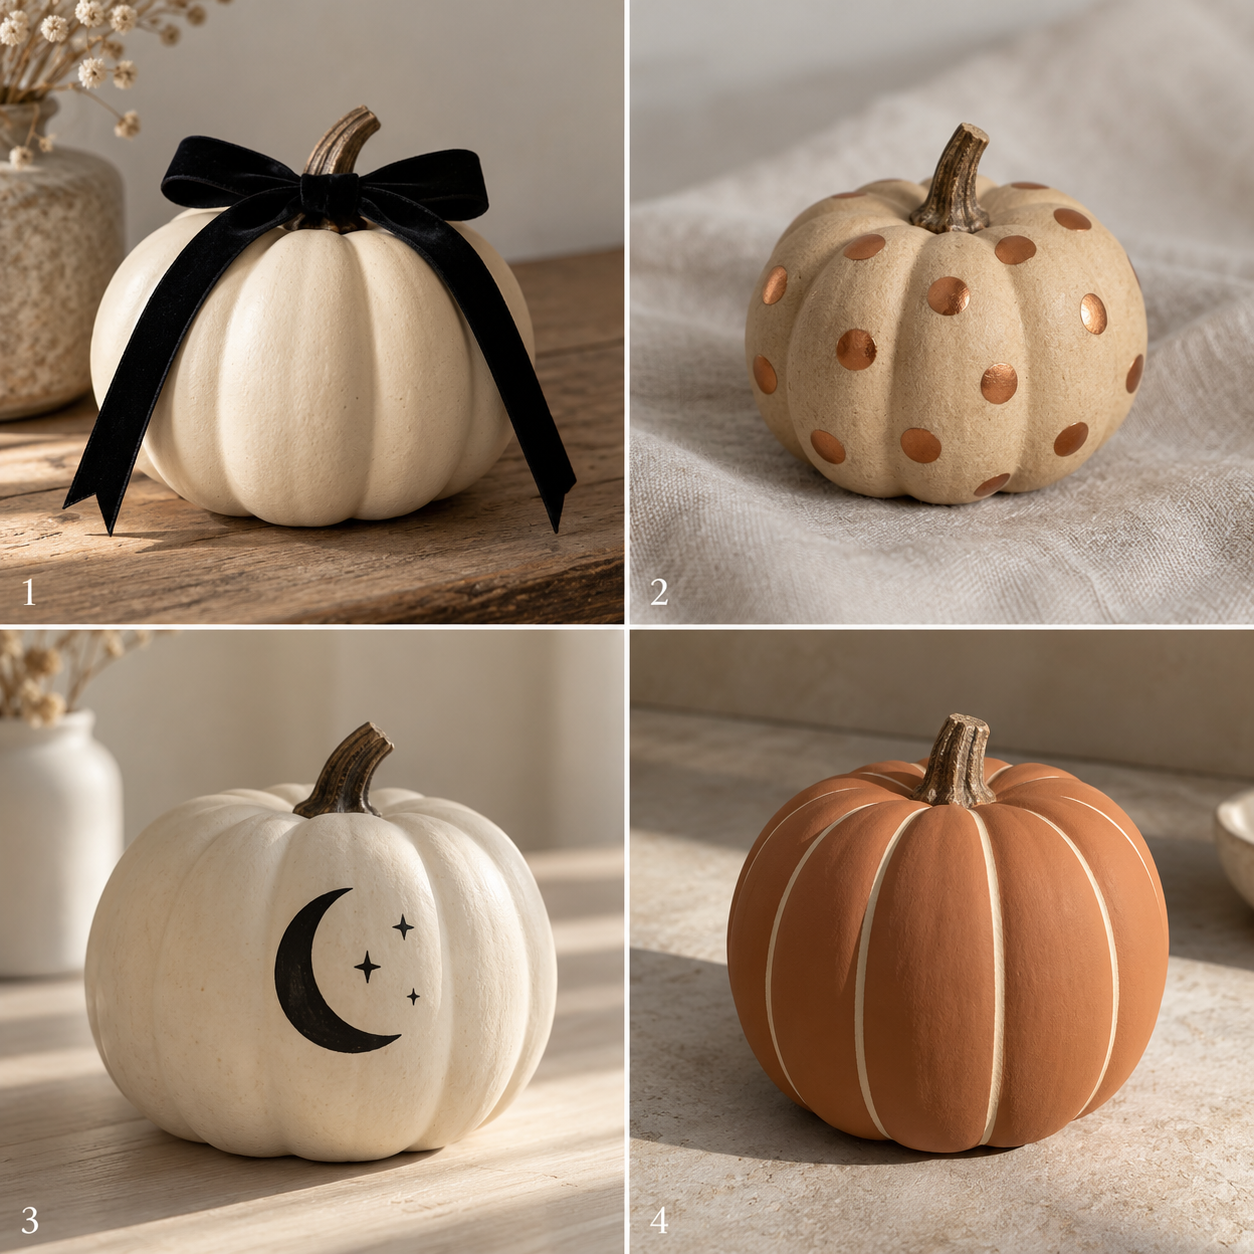
A matte cream craft pumpkin with black velvet ribbon around the stem is the simplest idea in the group. The contrast does the work, so the bow does not need to be large. Use a pumpkin that is already cream if you want to skip painting entirely. Choose ribbon with enough width to show its texture and trim the ends neatly. A small bow near the stem can feel more balanced than a long ribbon covering the whole pumpkin.
If painting is necessary, use a suitable product and let the finish dry according to its instructions before tying the ribbon. Keep the ribbon removable so you can change the look next year. Place the pumpkin on a shelf, tray, or console away from heat sources. This is a good first project because there is very little precision involved: the effect comes from two contrasting materials, and you can adjust the bow until it looks right without committing to a detailed design.
2. Copper dots on a beige pumpkin
Use a beige craft pumpkin and add small copper-colored painted dots at regular intervals. Keep the dots modest in size and leave enough space between them for the base color to show. A restrained pattern looks more polished than covering every visible area. You can follow the pumpkin’s vertical grooves loosely, letting the natural shape help organize the spacing rather than trying to draw a perfect grid across a curved surface.
Practice the dot size on scrap material first using a tool suitable for your paint. Work on one visible area at a time and let it dry before rotating the pumpkin. Follow the paint’s instructions rather than handling a surface that only looks dry. This design works well beside wood, cream fabric, and black accessories. If you want a small group, keep two pumpkins plain and use the dotted one as the accent. The metallic finish becomes more noticeable when it has some quiet space around it.
3. A crescent moon and a few tiny stars
Paint a simple black crescent moon and three small stars on a cream faux pumpkin. Keep the design on one side rather than repeating it all the way around. The cream base gives the shapes a clear background, and the limited number of symbols keeps the project manageable. Choose a smooth enough area for the motif and decide which side will face forward before starting. The pumpkin can then be displayed with its decorated face toward the room.
Sketch the arrangement on paper first to check the spacing. If freehand painting is not appealing, use a suitable stencil or another method intended for the surface. There is no need to make the stars identical. A few small shapes placed deliberately can look more relaxed than a dense pattern. This is a useful option when you like a Halloween reference but do not want a face on the pumpkin. It also pairs naturally with a black vase or a simple lantern nearby.
4. Terracotta with thin ivory stripes
A matte terracotta craft pumpkin with thin ivory vertical stripes gives you a warm, graphic look. Follow the existing grooves where possible, allowing the pumpkin’s shape to guide the lines. Keep the stripes narrow so the terracotta remains the main color. The combination feels autumnal without relying on bright orange, and it works well with cream, brown, and natural wood. A plain stem can remain as it is if it already suits the palette.
Let the base finish dry fully as directed before adding stripes. If you use tape or a stencil, check compatibility with the surface and remove it according to the product instructions. Do not worry about tiny variations that make the project look handmade. The useful goal is a clear repeated rhythm rather than ruler-straight lines on every curve. This design can stand alone on a console or sit beside a smaller plain ivory pumpkin, giving a two-piece arrangement enough contrast without adding more decorations.
5. Paper-leaf motifs on ivory
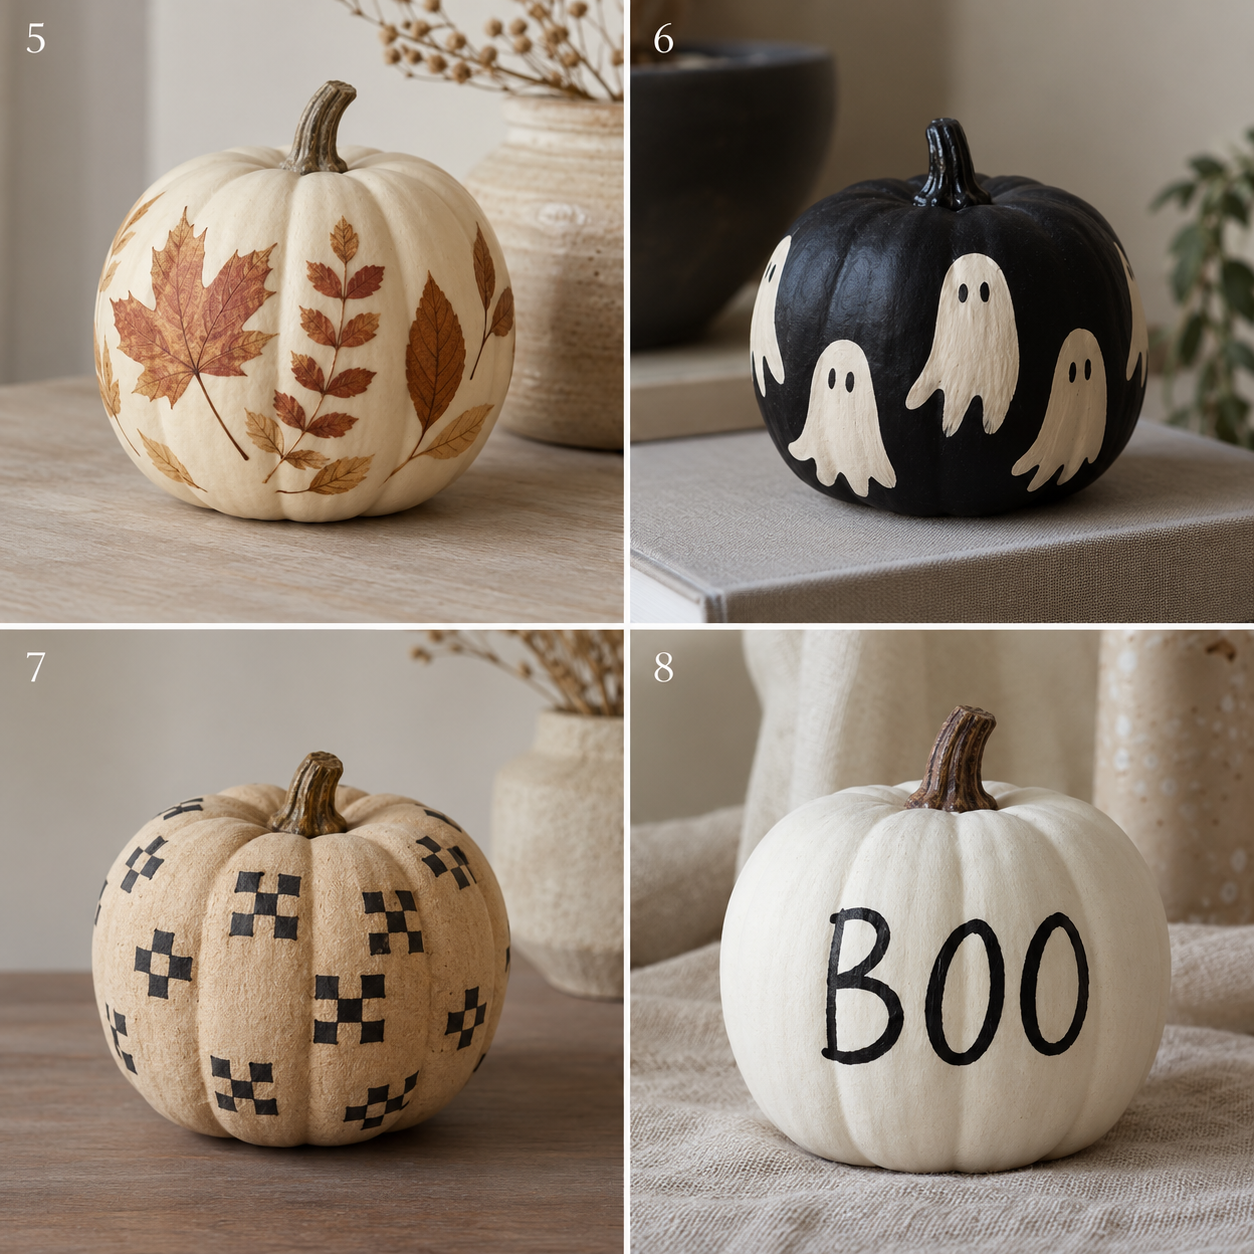
Attach a few paper-leaf motifs to one side of an ivory faux pumpkin using an adhesive suitable for the surface. Choose muted brown, cream, or black leaves and keep their shapes simple. A loose diagonal arrangement can look more natural than a rigid line. Leave part of the pumpkin bare so the motifs have room to be seen. Paper gives you control over the color and avoids relying on fresh leaves that may curl or deteriorate.
Arrange the leaves without glue first and take a quick reference photo before attaching them. That lets you decide on the spacing without rushing while adhesive is open. Follow the drying instructions and avoid lifting the pumpkin by its decorations. This is a good option when you prefer cutting or arranging shapes to detailed painting. Keep the finished piece indoors unless all materials are intended for the conditions. A single decorated pumpkin beside ordinary books or a small bowl can be enough for a shelf display.
6. Cream ghosts on matte black
A matte black faux pumpkin with a few small cream ghost shapes makes a clear Halloween accent. Keep the ghosts simple: rounded tops, a soft lower edge, and tiny dark eyes. You can place two or three on the front and leave the back plain. The cream against black is strong enough that the figures do not need outlines, shadows, or extra decorations around them. Smaller shapes often look more balanced than one oversized face.
Test the cream paint’s coverage on a small area and follow the product directions for coats and drying. If the first layer looks uneven, allow the appropriate time before adding another rather than repeatedly brushing wet paint. This project works well as the darkest piece in a group of neutral pumpkins. Put it beside a plain cream one and a warm beige one, and the color story is already complete. You do not need another themed sign to explain the little ghosts.
7. A small checkerboard patch
Use an oatmeal-colored craft pumpkin and paint a small black checkerboard patch on one side. Limiting the pattern to a patch makes the project easier than wrapping a perfect grid around the entire curved surface. Choose squares large enough to paint comfortably and let the edges of the patch follow a simple rectangular shape. The oatmeal base softens the black pattern and keeps it connected to a neutral room.
Plan the squares on paper first and choose the part of the pumpkin with the least awkward grooves. Use a suitable pencil, stencil, or marking method for the finish, testing it before covering a large area. Work slowly and allow the paint to dry as directed between stages. This is the most graphic idea in the group, so pair it with quieter objects rather than adding several competing patterns. A plain tray or a small stack of neutral books gives the checkerboard enough visual space to feel deliberate.
8. A small hand-lettered BOO
Paint a simple black BOO on the front of a white craft pumpkin. Keep the lettering large enough to read but leave a generous margin around it. A plain rounded style is easier to manage than an elaborate script on a curved surface. Decide whether you want the letters straight or gently following the pumpkin’s shape before you begin. The word itself makes the reference clear, so the rest of the pumpkin can stay undecorated.
Write the word on paper first to check its width. A suitable stencil can help if you prefer consistency, while hand lettering can look charming with small imperfections. Use the paint and tools intended for the surface, and wait for the finish to dry before handling it. This is a good final piece for a shelf or entryway because it needs very little around it. One word, one color contrast, and a stable place to sit are enough.
Build a small group without making every pumpkin different
Choose one decorated pumpkin as the focal point and keep the others plain. Repeat either the base color or the accent color so the group feels connected. Cream, oatmeal, black, and terracotta can work together, but you do not need all four. Two colors are often enough for a small tray or shelf. Vary the size of the pumpkins rather than adding a new pattern to each one.
Before packing reusable pieces away, let all finishes cure as instructed and protect the decorated surfaces from rubbing against one another. Keep removable ribbons and small accessories together so they are easy to find next year. If you only have time for one project, start with the cream pumpkin and black ribbon. The best no-carve idea is the one you enjoy making and can actually use in the space you have, without turning the whole room into a craft-supply storage area.
More Halloween ideas
8 Neutral Halloween Decor Ideas That Make a Small Home Feel Cozy · 8 Small Front Porch Halloween Ideas That Make a Big First Impression · 8 Minimalist Halloween Nail Ideas That Look Chic on Short Nails