Alright, fellow gamer, let’s be real: your gaming setup can be a mess of cables, random chairs, and a monitor perched on some questionable surface. But it doesn’t have to be. Imagine this—walking into a gaming room that feels like your personal HQ, where everything’s sleek, functional, and yes, cool as heck. Sounds good, right?
I’ve spent way too many hours tweaking my own space, trying not to go broke on fancy gear but still making it look and feel awesome. So, I’m here to share some easy, no-nonsense tips for setting up a simple cool gaming room that anyone can pull off. Let’s get into it!
Why Your Gaming Room Setup Matters
Think about it. You wouldn’t show up to a pro tournament with an old busted controller and a TV from 2005, right? Your environment affects how you play, how comfortable you are, and honestly, how much you wanna actually spend time there.
A simple cool gaming setup doesn’t mean expensive gear everywhere. It means having the right vibe, smart organization, and a setup that just works without headaches. Plus, it’ll make those marathon sessions feel less like punishment and more like pure fun.
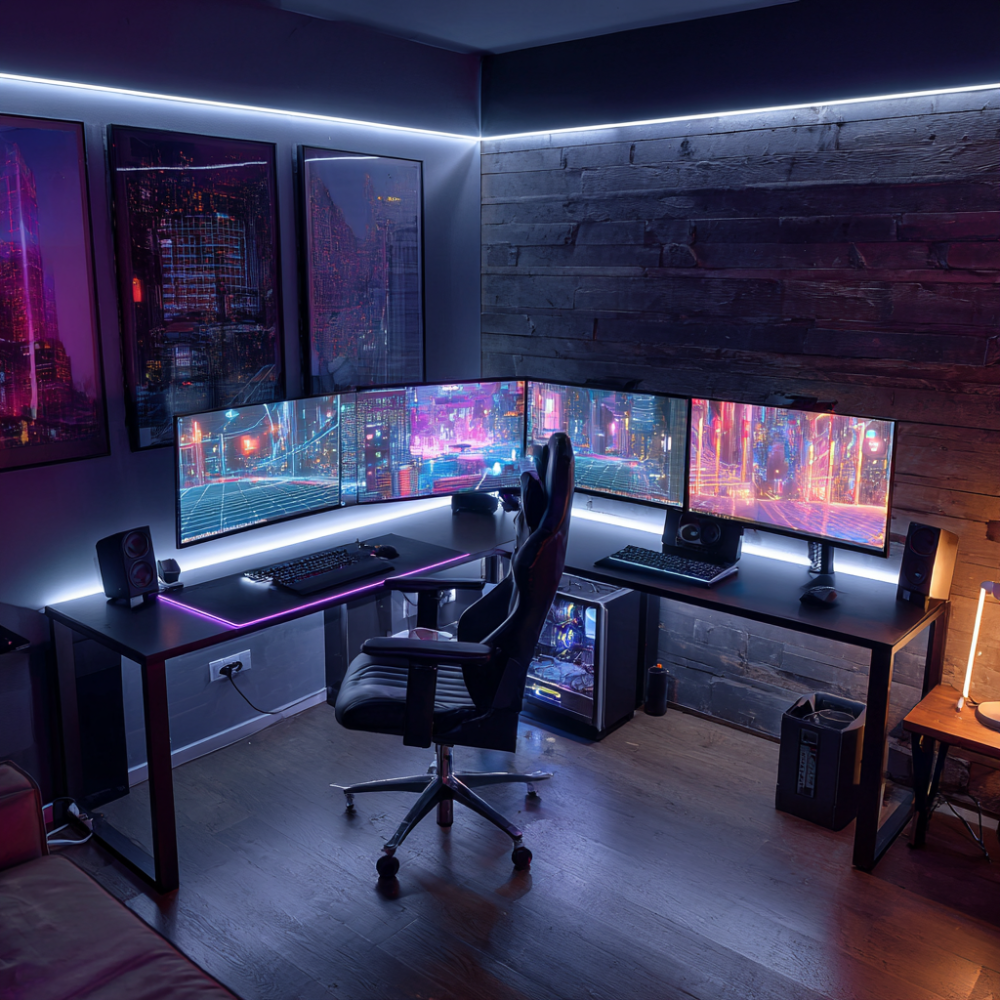
Start with the Basics: The Essentials for Any Cool Gaming Room
1. Pick the Right Desk and Chair (No, Your Kitchen Table Doesn’t Count)
Trust me, I tried gaming on my kitchen table once. Spoiler: it was not fun. A proper desk and chair set you up for comfort and focus.
- Desk: Look for a sturdy desk with enough surface for your monitor(s), keyboard, mouse, and maybe some snacks. Bonus points if it has cable management features—because, trust me, cables everywhere is chaos.
- Chair: Invest in a chair that supports your back. You’re going to be sitting for hours, so comfort isn’t optional. Even a budget-friendly ergonomic chair beats an old dining chair by miles.
2. Monitor Setup: Bigger Isn’t Always Better
You might think “the bigger the screen, the better,” but clarity and positioning matter more than size. Here’s what worked for me:
- A 24 to 27-inch monitor hits the sweet spot for most.
- Adjust height so your eyes line up roughly with the top third of the screen.
- Consider a dual-monitor setup if you multitask or stream. It’s a game-changer for managing chats, music, and game info without alt-tabbing all the time.
Lighting: The Unsung Hero of Gaming Setups
You’d be surprised how much lighting affects your gaming vibe and even your eyes. Those harsh overhead lights? Yeah, not your friends.
Go for Ambient and Task Lighting
- LED strip lights behind your monitor add a cool glow without glare. RGB is tempting, but subtle colors like blue or purple are easier on the eyes over long sessions.
- A desk lamp with adjustable brightness helps when you want to read manuals or just chill without eye strain.
- Avoid pure darkness or super bright white light. Balance is key.
PS: If you’re like me and love a little drama, syncing your lights with your games can boost immersion. But FYI, it’s not necessary to look cool.
Organize Like a Pro: Cable Management and Storage Hacks
This one’s a game-changer, literally.
Simple Cable Management Tips
- Use Velcro straps or cable clips to bundle cables neatly.
- Route cables behind the desk and secure them with adhesive hooks.
- If your desk allows, use a cable tray or raceway underneath to keep everything out of sight.
Storage Solutions
- Use small shelves or drawers for controllers, headphones, and game discs.
- Floating shelves are great if you’re tight on floor space.
- A dedicated space for snacks… because, priorities.
Sound Setup: Quality Audio Without Breaking the Bank
No one likes terrible sound. Cracking speakers or tinny headphones can ruin immersion faster than a lag spike.
Headphones vs Speakers
- Headphones: If you’re serious about sound and don’t want to disturb anyone, a good pair of gaming headphones with a mic is the way to go. I swear by mine for clarity and game communication.
- Speakers: For chill sessions or parties, a decent 2.1 speaker system with a subwoofer gives that rich, room-filling sound.
Pro Tip: Acoustic Treatment
You don’t need to build a sound studio, but throwing in a few foam panels or even heavy curtains can reduce echo and improve sound quality dramatically.
Personalize It: Make the Space Your Own
You’re not just gaming; you’re hanging out in your own kingdom. Why not make it feel that way?
- Add posters, collectibles, or LED signs that reflect your favorite games or characters.
- Use themed mousepads, desk mats, or even custom keycaps to add personality.
- Plants? Yep, even a little greenery can make the room feel less “tech dungeon” and more inviting.
Keep It Simple, Keep It Cool: Avoid Overcomplication
Look, it’s tempting to buy every gadget and accessory under the sun, but sometimes less really is more.
- Don’t clutter your desk. If you’re not using it daily, it probably doesn’t belong there.
- Focus on quality over quantity. A few well-chosen items beat a mountain of mediocre gear.
- Your setup should make gaming easier and more fun, not harder.
Quick Rundown: Simple Cool Gaming Room Must-Haves
Here’s a handy checklist for when you’re starting out:
- Ergonomic chair + sturdy desk with cable management
- Monitor(s) sized for your needs, positioned at eye level
- Ambient LED lighting behind the monitor
- Desk lamp with adjustable brightness
- Velcro cable ties and cable trays for tidy wires
- Headphones or quality speakers for immersive sound
- Personalized decor like posters or collectibles
- A few storage solutions for controllers and accessories
Wrapping Up: Your Gaming Room, Your Rules
There you have it—a simple cool gaming room setup that’s easy to achieve without breaking the bank or your sanity.
The key is balancing comfort, function, and a dash of style. Plus, making the space truly yours. Because honestly, what’s the point if you don’t feel hyped every time you step in?
So, are you ready to level up your gaming space? Take these tips, tweak them for your style, and enjoy the upgrade. Your next epic gaming session deserves it! 🙂