
You know that mess of tangled chargers, buzzing phones, and mysteriously disappearing cables all over your kitchen counter or nightstand? Yeah, it’s annoying. And let’s be honest, no one enjoys crawling under the table looking for a charging brick at 10 p.m. when their phone is at 3%.
That’s why I finally built myself a DIY wall-mounted charging station—and spoiler alert: it changed my tech-life game. It’s sleek, compact, and keeps everything juiced up without the chaos. Oh, and yes, it actually looks nice. Not like one of those “Pinterest fails” held together by duct tape and regret.
If you’re ready to turn cable clutter into cable cool, grab your tools and let’s do this together. 💪
Why Build a Wall-Mounted Charging Station?
Before we go full Bob the Builder, let’s talk why this little DIY is worth your weekend.
✅ Say Goodbye to Cable Chaos
You know the drill—chargers everywhere, cables crossing each other like spaghetti. A wall-mounted charging station gets everything off your surfaces and into one clean spot.
✅ Free Up Counter Space
More room for snacks, books, or whatever random things end up on your counters. And IMO, anything that lets me put a plant where there used to be phone cords = a win.
✅ Central Charging = Fewer “Where’s My Phone?!” Moments
Everyone in my house knows exactly where to find their device—and where to put it back. Revolutionary.
✅ It Just Looks Better
And let’s not pretend looks don’t matter. A well-designed charging station makes your space feel way more put together—even if everything else is chaos 😅.
What You’ll Need
Don’t worry, we’re not building a spaceship. This project’s super beginner-friendly, and you can customize it based on your vibe (modern, rustic, minimal, techy, whatever).
🛠️ Tools:
- Drill + bits
- Screwdriver
- Measuring tape
- Level (unless you’re into slanted phones)
- Stud finder (optional, but helpful)
- Saw (if you’re cutting your own wood)
🧰 Materials:
- Wood board or box (a shallow shelf, drawer organizer, or even a repurposed picture frame box works great)
- Power strip (with USB ports if possible)
- Cable clips or cord organizers
- Mounting hardware (screws, wall anchors, etc.)
- Sandpaper and paint or stain (optional—make it cute)
- Velcro strips or adhesive (for securing chargers inside)
- Labels or a label maker (if you’re fancy)
Step 1: Pick the Perfect Spot
Location is everything—unless you like charging your phone next to your toilet (no judgment, but… really?).
Best places for your charging station:
- Kitchen corner (popular family zone)
- Entryway wall (drop phone and keys all at once)
- Bedroom (clean up that nightstand)
- Home office (if you like feeling extra organized)
Just make sure there’s a wall outlet nearby. Otherwise, you’ll need an extension cord—and that kinda defeats the clean look.
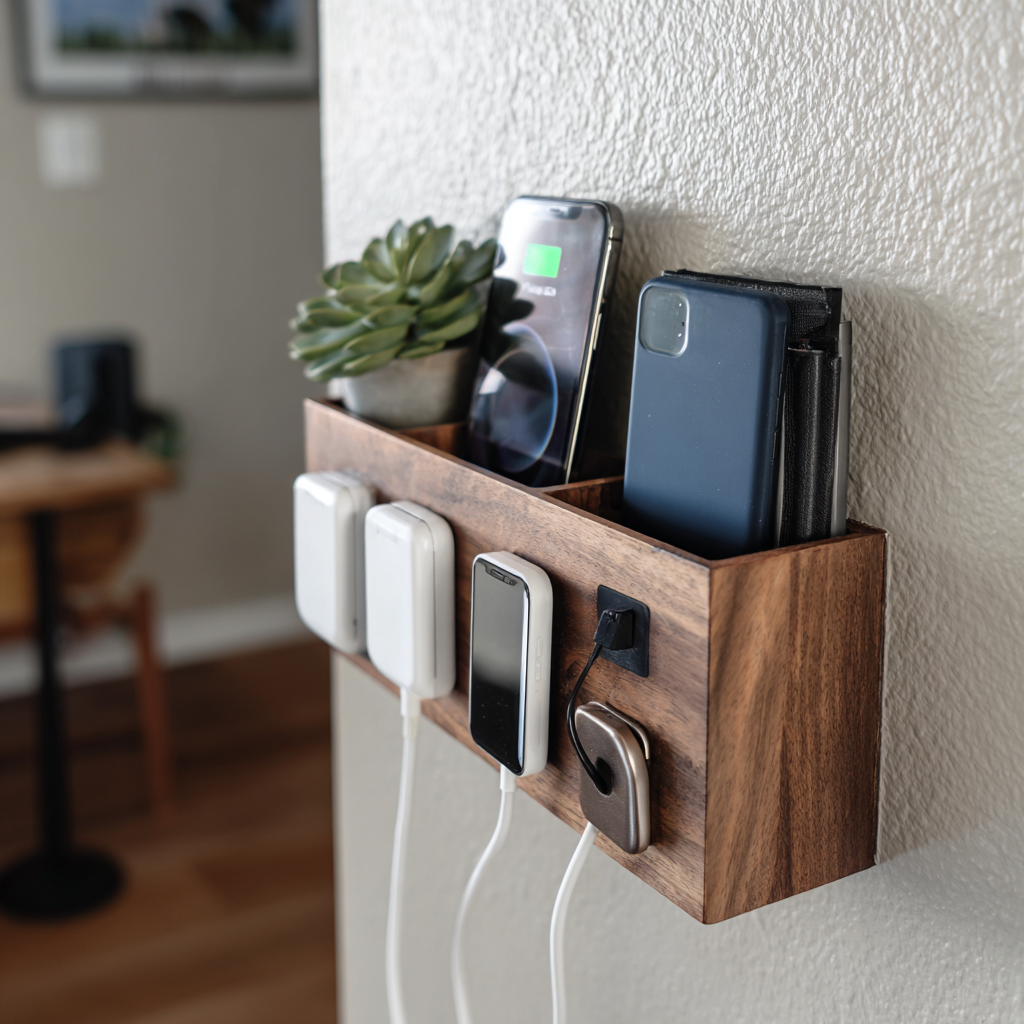
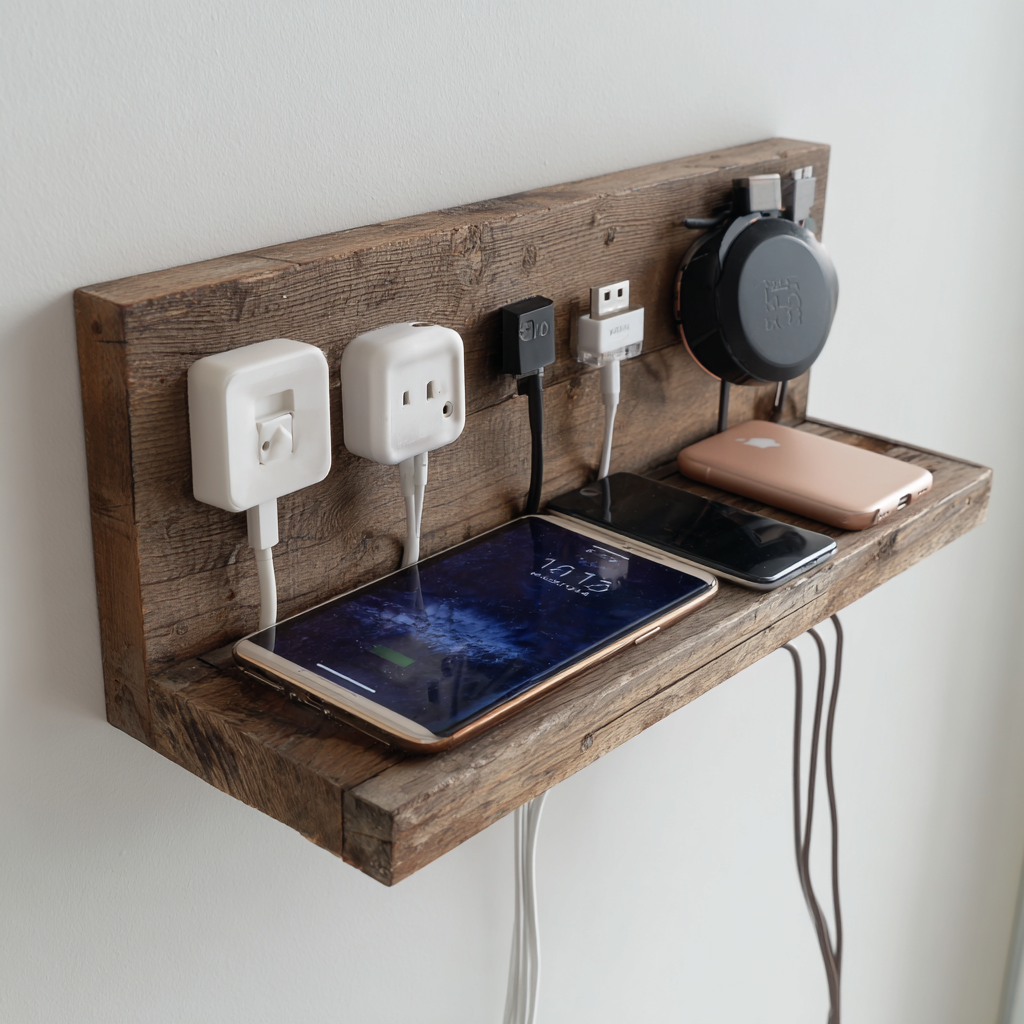
Step 2: Choose Your “Station” Base
This is where you get to be a little creative. I used a shallow wooden drawer I found at a thrift store (cleaned it up, stained it, chef’s kiss), but here are some other easy options:
DIY Base Ideas:
- Wall-mounted file holder (metal or wood)
- Small wooden crate
- Floating shelf with lip
- Shadow box frame with backing removed
- IKEA spice rack (not just for paprika, folks)
Just make sure it’s deep enough to hold a phone or tablet, and has space to tuck in the power strip.
Step 3: Prep and Pretty It Up
If you’re using raw wood or a thrifted piece like I did, give it a little TLC:
- Sand down any rough edges
- Stain or paint it (go neutral, bold, whatever floats your aesthetic boat)
- Let it dry completely (don’t rush it—been there, left sticky fingerprints 😐)
Want to add a personal touch? Try:
- Vinyl labels for names or device types
- Chalkboard paint for a tech-to-do list
- Faux leather or felt padding inside
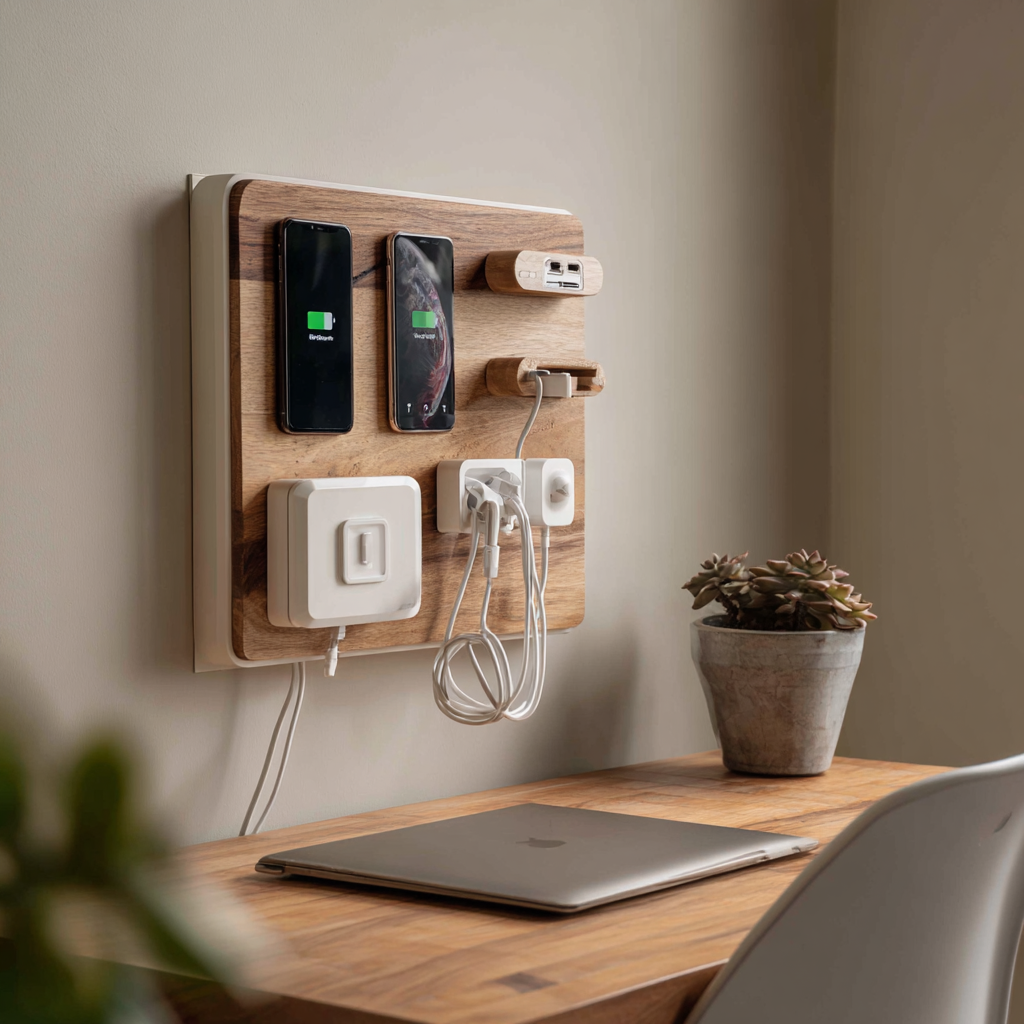
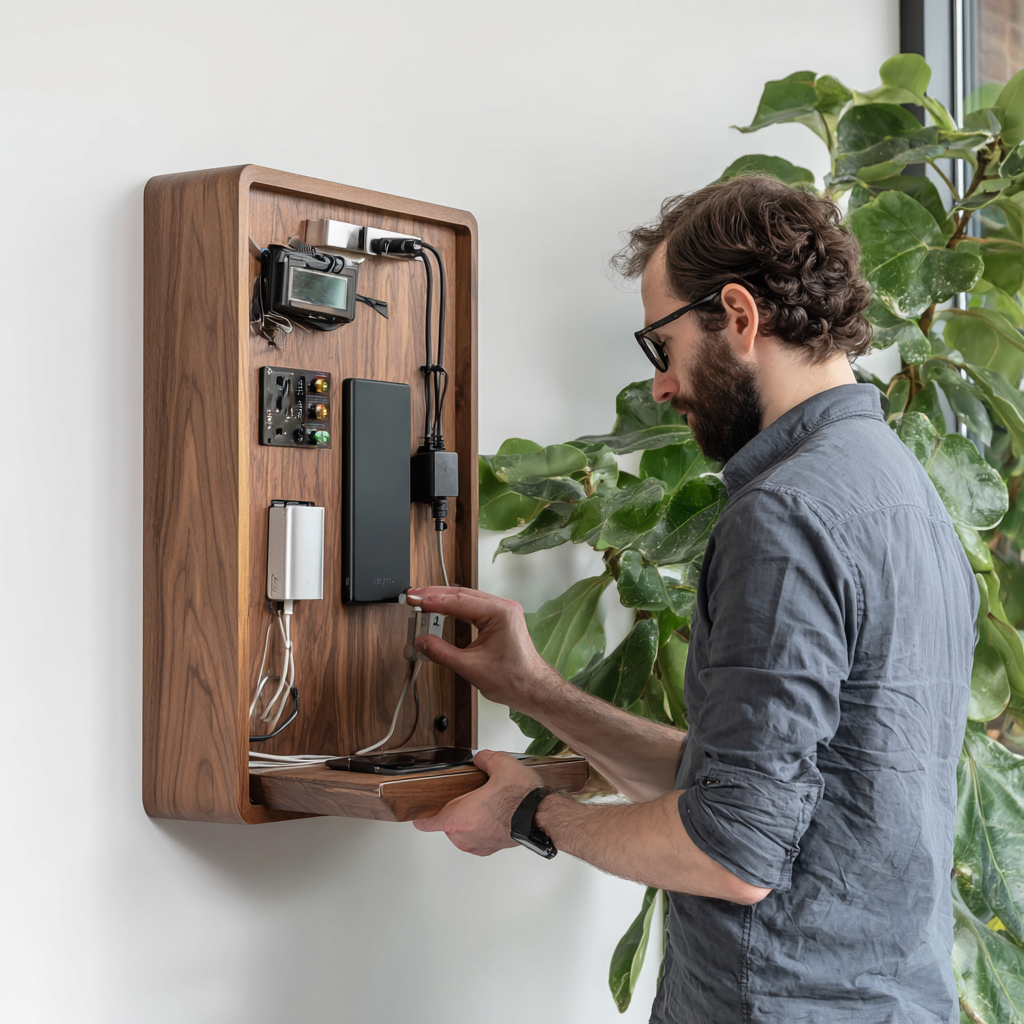
Step 4: Install the Power Strip
Now the real magic happens.
To install:
- Mount or stick the power strip inside your base (Velcro strips or strong adhesive work great).
- Make sure the plug cord can snake out the back or side—drill a small hole if needed.
- Plug it into the wall and test it before mounting. Trust me—you don’t want to install it and then realize it doesn’t even turn on 😬.
Pro Tip: Get a strip with both USB and standard outlets so you can charge phones and things like earbuds or smartwatches.
Step 5: Mount the Station to the Wall
Let’s get that bad boy up on the wall.
- Use a stud finder to hit studs if possible. More secure = better.
- If you’re not on a stud, use wall anchors (nobody wants your tablet crashing to the floor at 2 a.m.).
- Double check with a level to make sure it’s straight.
- Screw it in securely, then step back and admire.
Boom. Mounted.
Step 6: Organize the Cables (So You Don’t Undo All Your Work)

You’ve done the hard part—now let’s make sure it doesn’t turn into a cable rat’s nest overnight.
Cable management tips:
- Use cable clips to guide cords where you want them.
- Shorten long cords with twist ties or Velcro wraps.
- Label cords if multiple people are using the station.
- Tape or Velcro each charger in place so it stays put.
FYI: I love magnetic cable tips—they make plugging and unplugging way faster and feel kind of futuristic. 🤖
Step 7: Add Devices and Admire Your Glorious Work
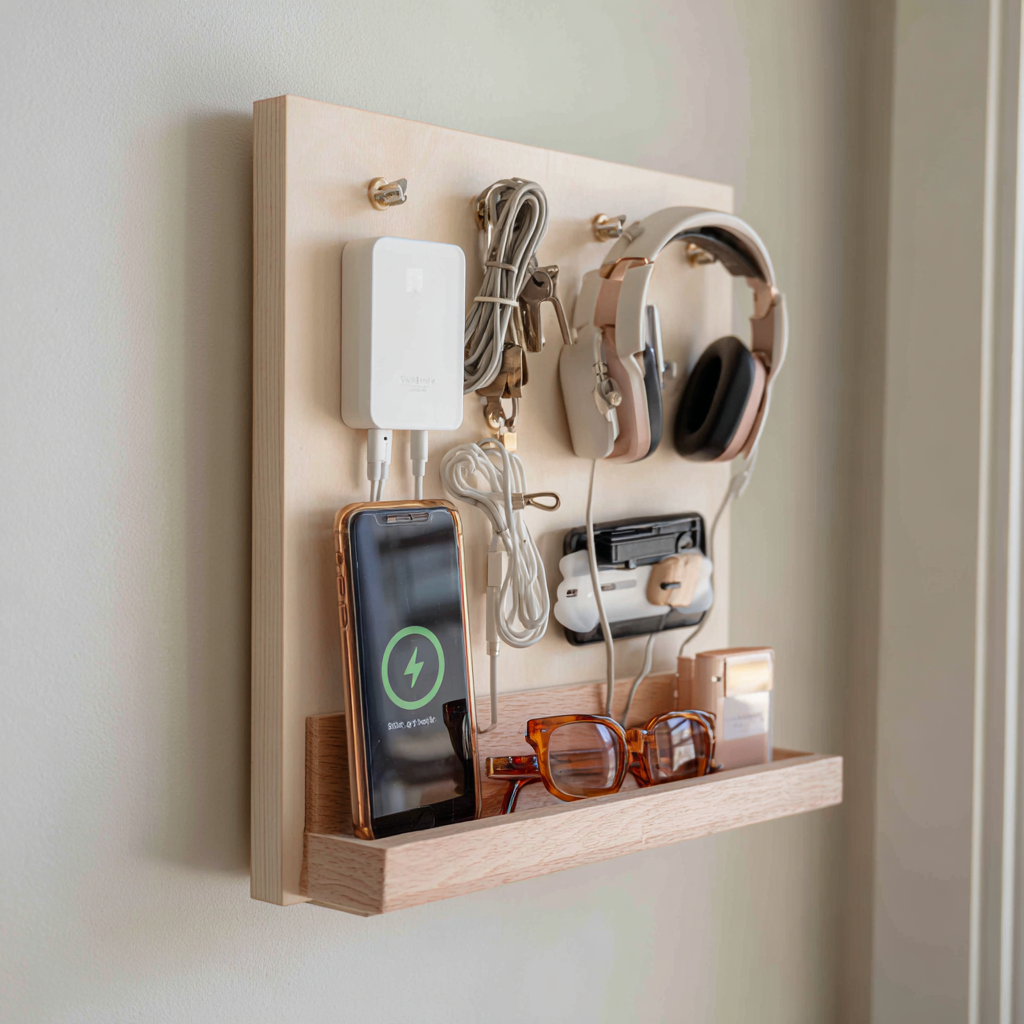
Slide in your phone, tablet, headphones, smart watch—you name it. Everything should have its spot.
And just like that—you’ve got a clutter-free, cable-tamed charging zone.
Honestly? You might even get compliments on it. And when your friends ask, “Where’d you buy that?” you can smugly reply: Oh this? Just a little DIY I whipped up. 😉
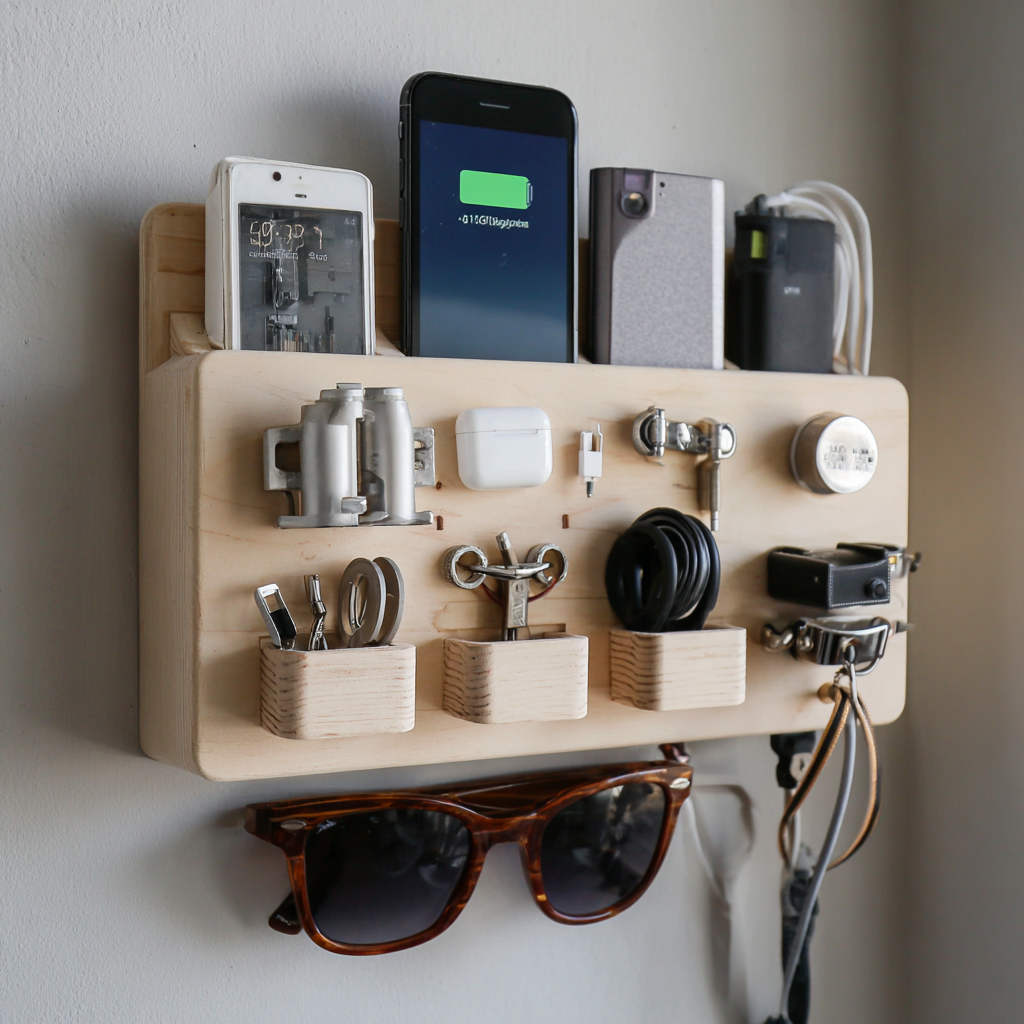
Custom Ideas to Make It Yours
Want to level up your charging station even more? Go for it.
Add-ons and extras:
- LED light strip inside for a techy vibe
- Corkboard or whiteboard on the side for notes
- Shelf above for keys, wallets, sunglasses, etc.
- Hooks underneath for cables, cords, or headphones
- Built-in wireless charger (if you’re feeling extra)
The goal? A spot that works for your daily chaos—not someone else’s Instagram aesthetic.
Common Charging Station Mistakes (AKA “Don’t Be Me”)
Before you go full HGTV, here are a few “oops” moments to avoid:
- Overloading your power strip — Make sure it can handle the total wattage. Don’t fry your stuff.
- Using low-quality cables — Cheap cords = slow charging + fast fraying.
- Placing it too high or low — Mount it at a comfortable, reachable height.
- Blocking ventilation — Don’t pack it so tight that heat can’t escape. Electronics get warm. No surprise fires, pls.
Final Thoughts: Clean, Convenient, and Kinda Cute
Let’s be real—building your own DIY wall-mounted charging station is one of those simple projects that makes a HUGE difference. No more tripping over cords or fighting over outlets. Everything has a home, and that means fewer headaches for you.
And bonus? It’s actually kind of fun to build. Plus, you get to say, “I made this,” which hits different.
So go ahead—pick your spot, grab a power strip, and give your tech the tidy home it deserves.
P.S. Got your own spin on a charging station? Tag me—I want to see what you come up with! And if you add a cupholder to it… well, you win. 😄📱